How to assign custom fields during import?
This article applies to the new “Add contacts” view. If you see a different interface, you may still have the older version. However, steps and button names are mostly consistent across both views.
If the list you’re importing contains custom field values, you’ll need to match them to the custom fields you have in your GetResponse account. You can also create a custom field during this step and assign it to the values you’re importing.
- Go to Contacts > Add contacts.
- Select to import contacts From file.

- Upload the list and configure import settings. After doing so, click on Next.
The uploaded emails and custom fields—if used—are displayed as a table. The Email column is assigned automatically. If you’d like us to automatically assign the Name field, be sure to include a column header labeled “name” in your file. If your remaining column headers match the custom fields in your GetResponse account, they’ll be automatically assigned, too. Unassigned custom fields are marked with “?”.
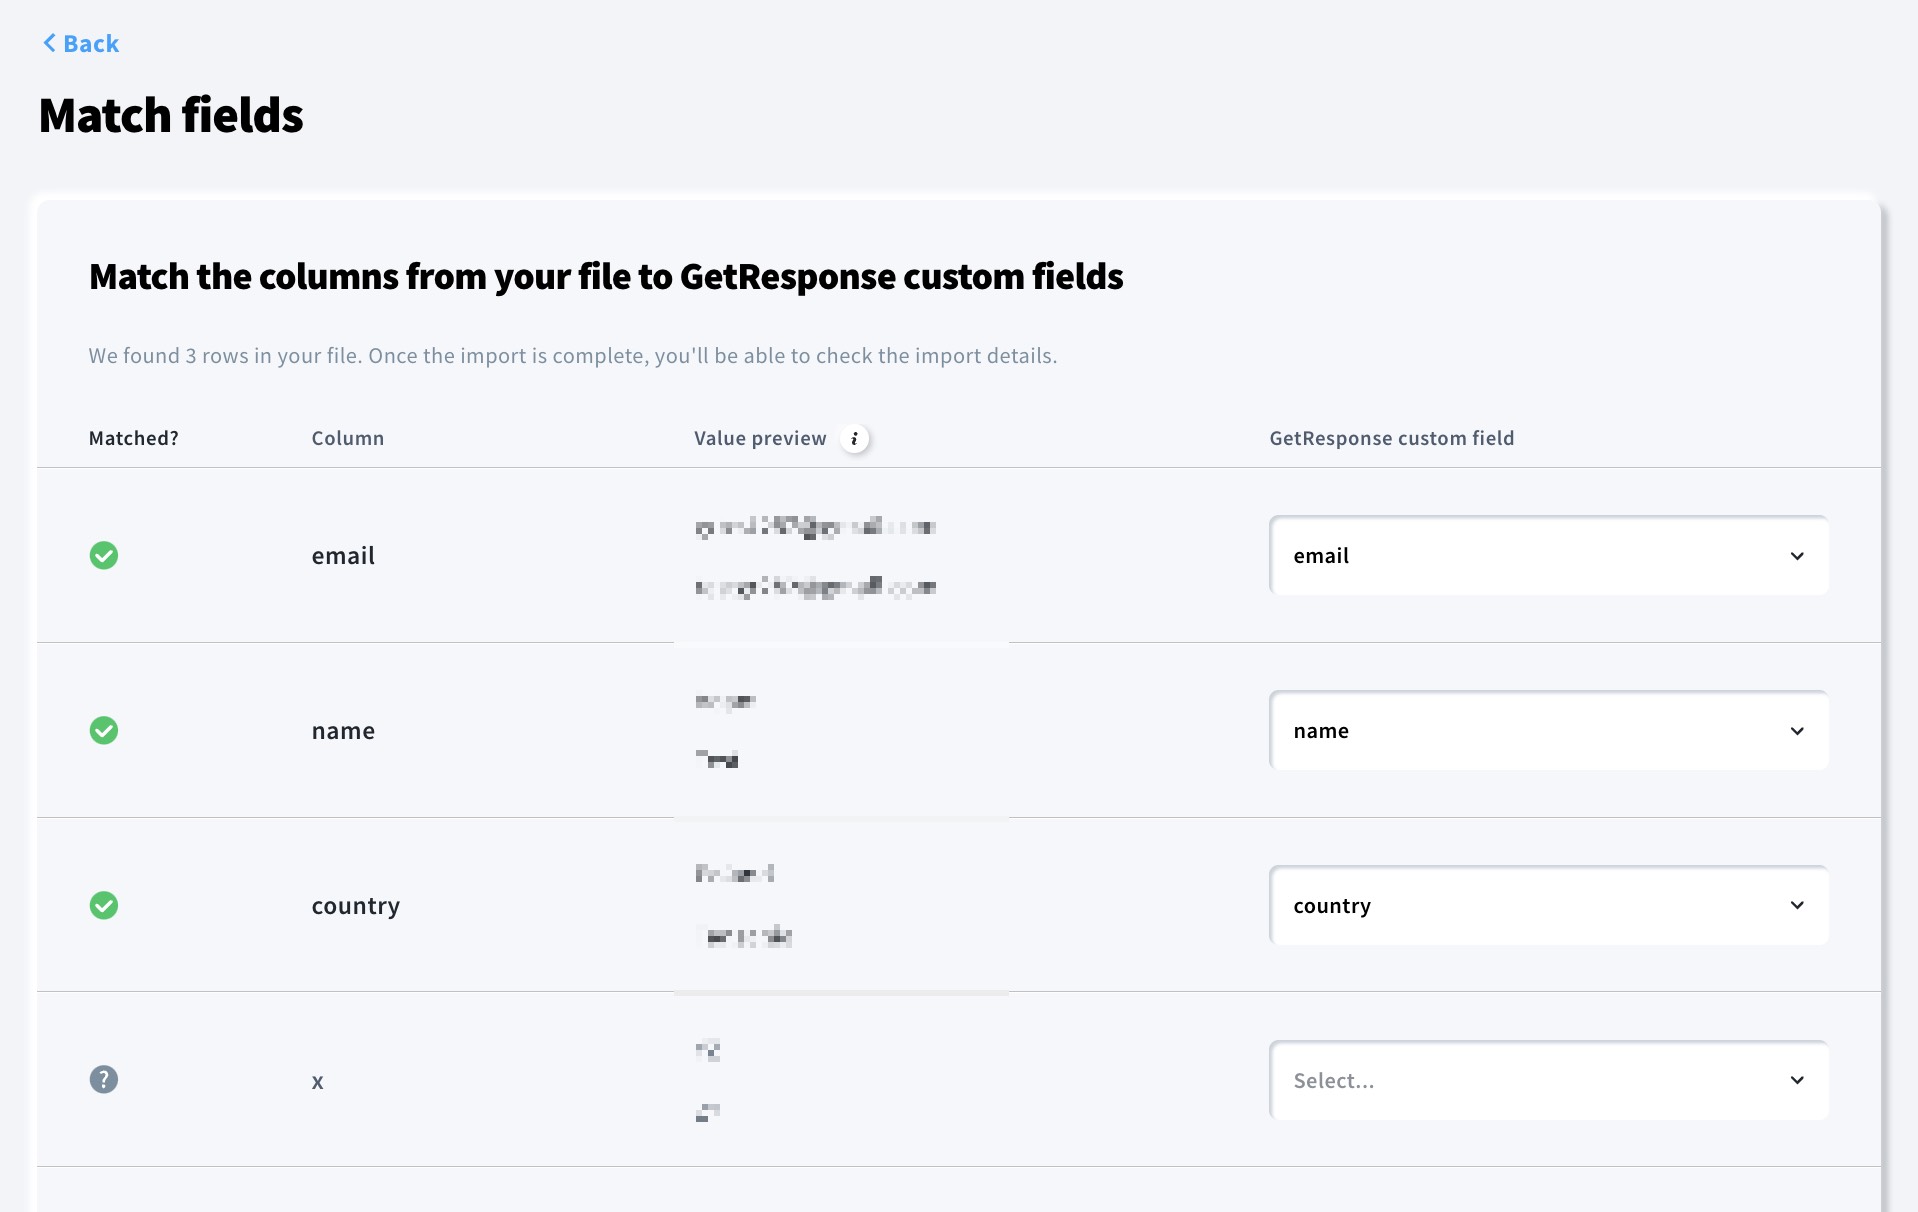
Scroll up and down to see all the columns. Click Back to return to the file selection screen.
Note: The page displays 20 rows but we’ll import all the fields in the columns even if you can’t see them.
For unassigned custom fields, you’ll need to:
1. Expand the Select… field.
2. Select one of the available options:
- Choose a custom field from the list.
- Select Don’t match. This field would not be imported.
- Create a custom field.

3. To skip assigning custom fields to all unmatched fields, select Do not import unmatched columns.
4. When you’re done assigning the custom fields, click Import.


