How to add DKIM and DMARC records in Namecheap?
Starting in February 2024, Gmail and Yahoo are rolling out new authentication requirements which require using a custom DKIM authenticated domain with DMARC reinforced.
In April 2025, Microsoft joined them with a similar announcement.
GetResponse strongly advises all senders to use email addresses from their own private domains as a from email address, and to configure both DKIM and DMARC.
For additional details on these modifications, refer to our blog posts:
Gmail and Yahoo’s Authentication Changes: All You Need to Know
Microsoft’s new authentication requirements — All you need to know
To add your own DKIM key, make sure you have:
- Your own domain.
- Access to the DNS administration panel.
- A DKIM key is provided by GetResponse.
Getting DKIM key
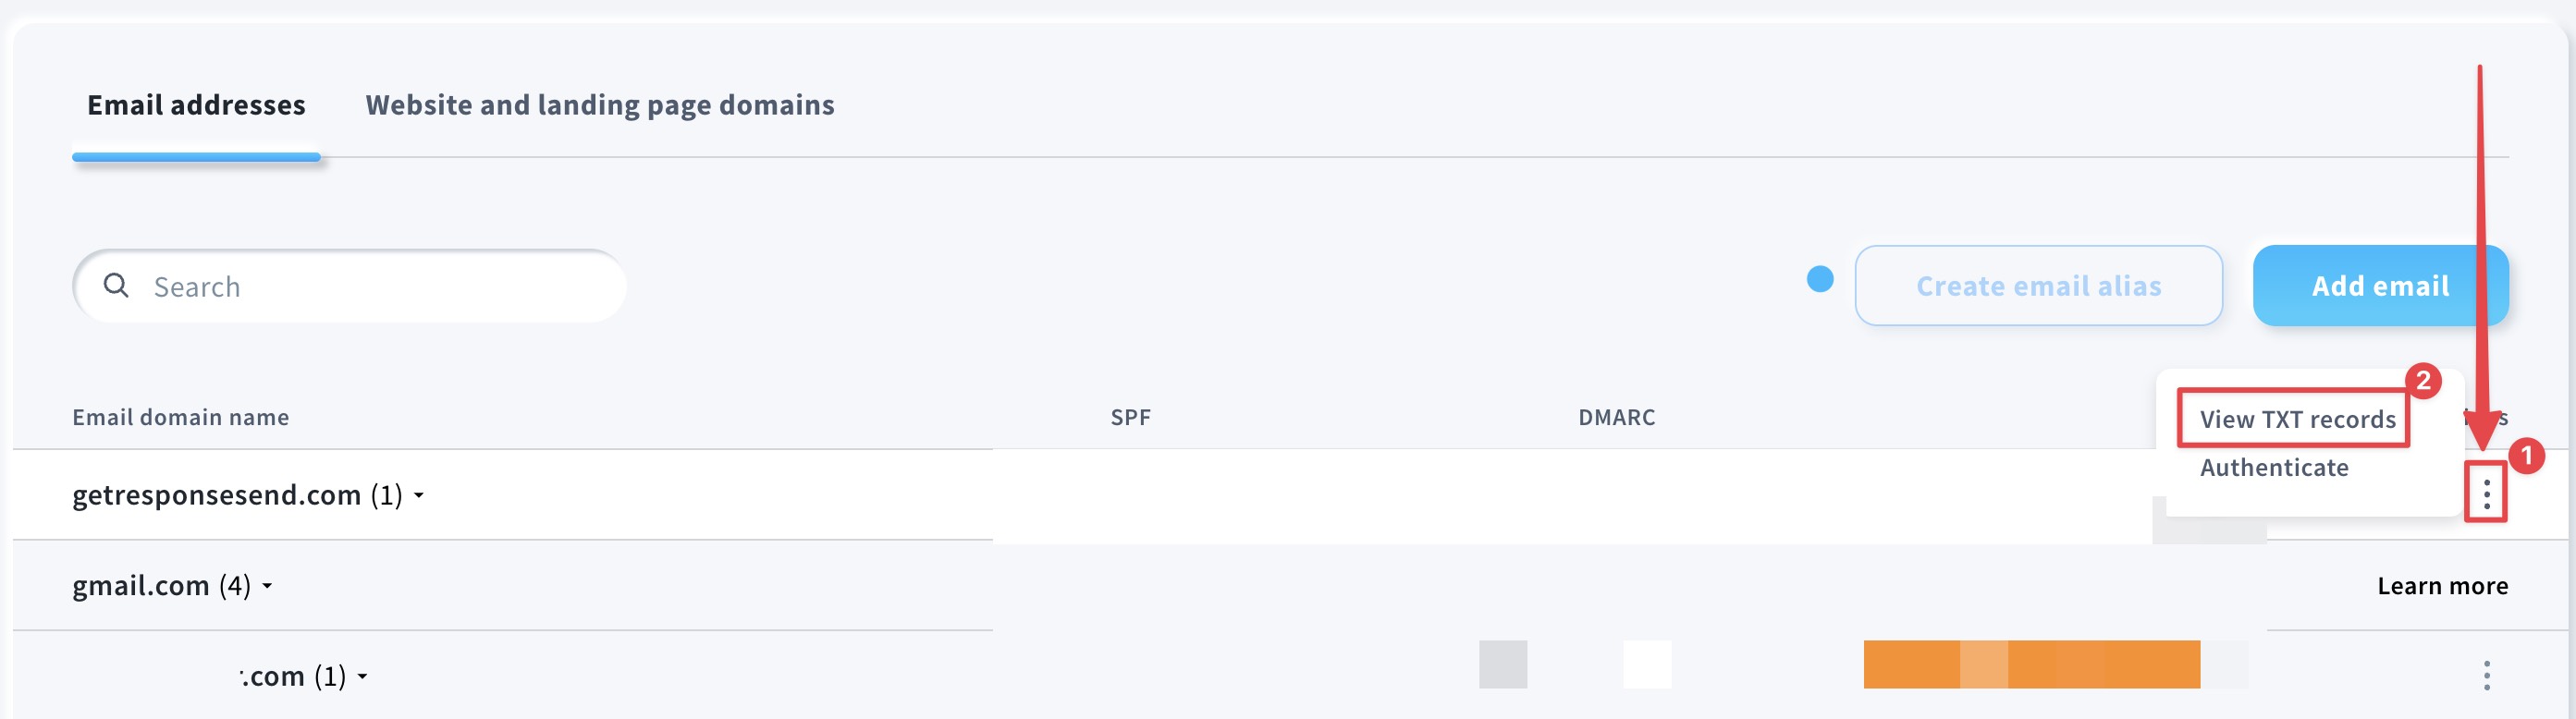
- In the GetResponse Dashboard, click Profile >> Emails and Domains.
- Go to Email addresses tab and click Actions menu (3 dots) next to the domain name you would like to generate the DKIM key for. From available options select View TXT records.
- (Optional) If you would like to use 2048-bit DKIM key – move the slider beside Generate a 2048-bit DKIM key for stronger protection and confirm that.

- Copy host name and value from the pop-up window.

Adding DKIM record in Namecheap
These steps will allow you to add the necessary DKIM record for your domain within Namecheap.
- Log in to your Namecheap account.
- Click on Account on the top-right and then click on Domain List.

- Click on Manage button beside your domain.

- Click on Advanced DNS tab.
- Click Add new record.

- Select the record Type:
TXT Record. - Paste the Host name you got from your GetResponse account.
- Paste the DKIM Value copied from your GetResponse account.
- Leave the TTL as
Automatic. - Hit Save all changes when ready.

Adding DMARC record in Namecheap
After adding DKIM you can add DMARC straight away. If you are doing this at another time, repeat steps 1-4 from the previous paragraph.
- Click Add new record.
- Select the record Type:
TXT Record. - Enter the Host name:
_dmarc - Enter the Value:
v=DMARC1;p=none - Leave the TTL value as
Automatic. - Hit Save all changes when ready.


